When we present users of our apps with opportunities to input data, there’s often the possibility that they can input data incorrectly. They might leave a required input blank, or make a series of choices that make no sense in combination, or fill the “Email address” field with a value that is clearly not a valid email address.
In these cases, we want to provide feedback to the user that they’ve made a mistake.
Basic usage
To add input validation to your app:
Create an
InputValidatorobject (in this doc, we will usually name the variableiv).Add one or more validation rules to
iv.Start displaying realtime feedback in the UI by calling
iv$enable().Guard calculations and operations that rely on valid inputs, by checking that
iv$is_valid()returnsTRUE.
Note that all of these steps must be performed in your Shiny app’s
server function.
To see this in action, let’s look at the server function from the
01_simple example app [source,
live demo].
server <- function(input, output, session) {
# 1. Create an InputValidator object
iv <- InputValidator$new()
# 2. Add validation rules
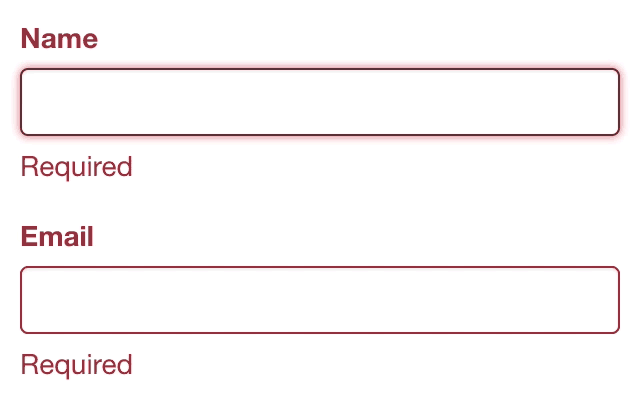
iv$add_rule("name", sv_required())
iv$add_rule("email", sv_required())
iv$add_rule("email", ~ if (!is_valid_email(.)) "Not a valid email")
# 3. Start displaying errors in the UI
iv$enable()
output$greeting <- renderText({
# 4. Don't proceed if any input is invalid
req(iv$is_valid())
paste0("Nice to meet you, ", input$name, " <", input$email, ">!")
})
}This validator has rules that check that a value is provided for
input$name and input$email, and that the
provided email is valid.
Adding rules
The most important part of the code above is the expression of
validation rules via add_rule() calls. The function
signature of add_rule() looks like this (minus the
session. argument, which can generally be ignored):
InputValidator$add_rule(inputId, rule, ...)inputId should be a single-element character vector,
with the ID of the input to be validated. Note that each call to
add_rule must check the validness of one and only one
input.
The rule argument can take various forms:
Rules from helper functions
shinyvalidate comes with a few helper functions that implement common
validation rules. The first rule you’ll need to add for each input is
either sv_required()
or sv_optional().
sv_required()
The sv_required helper is likely to be the one you reach
for most often:
iv$add_rule("title", sv_required(message = "Title must be provided"))This rule will cause a validation failure if the user does not
provide a value for input$title.
The message argument is optional; if you omit it, the
default message is simply “Required”. Keep in mind that validation error
messages will be displayed next to the erroneous input, so it’s
generally not strictly necessary for the error message to spell out
which input it refers to.
You’ll almost always want sv_required() to come before
other rules for an input, so that NULL/empty checking can
be performed before any other rules.
sv_optional()
The sv_optional() helper is used when an input is not
required, but when it is present, it needs to be validated by subsequent
rules. For example, if an email is not required:
iv$add_rule("email", sv_optional())
iv$add_rule("email", ~ if (!is_valid_email(.)) "Invalid email address")
If sv_optional() detects that the input is
empty/missing, it causes remaining tests for that input to be skipped.
In the example above, if the user provides a value for
input$email, it will be checked against
is_valid_email(); if not, then the input will be considered
valid (even though it is empty).
Because sv_optional() only causes subsequent
rules to be skipped, order matters; be sure to add
sv_optional() before any other rules for the same
input.
Rules as formulas
If your validation logic differs from the helper functions described above, you can use a formula to implement custom rules.
iv$add_rule("email", ~ if (!is_valid_email(.)) "Not a valid email")Validation formulas should test the . variable, and
return either NULL if the value is acceptable, or else a
single-element character vector describing why the value is
problematic.
(If you’re wondering why the formula in this example doesn’t end with
else NULL, note that in R, if expressions
automatically return invisible(NULL) when false and no
else is present.)
Rules as functions
Finally, you can provide validation logic as a function.
iv$add_rule("count", function(value) {
  if (value < 0) {
    "Negative values are not allowed"
  }
})
Functions receive the value to test as an argument (named
value by convention), and should return NULL
if that value is valid, and a single-element character vector with a
descriptive message if the value is invalid.
Note that you can use named functions, not just anonymous ones; and
that if the function takes additional arguments, these can be provided
by passing ... arguments to iv$add_rule(),
similar to how lapply works. This example demonstrates
both:
not_greater_than <- function(value, limit, message = "Value is too high") {
  if (value > limit) message
}

iv$add_rule("samples", not_greater_than, limit = nrow(df),
  message = "Sample count cannot exceed number of rows"
)
(TODO: make examples reproducible)
Displaying real-time feedback
Once you’ve created an InputValidator object and
populated it with rules, shinyvalidate has the information it needs to
check input values and report any problems it detects.
However, it doesn’t do so by default. Instead, you must call
iv$enable() at least once to get validation errors to
appear. Once iv$enable() has been called, though,
validation messages will appear, update, and disappear reactively;
there’s no need to call enable() as input values
change.
The reason for this design is because many forms have an explicit “Submit” or “Continue” button, and in those cases, you may want to suppress the display of validation errors until the user actually attempts to submit the form. This is considered a better user experience than overwhelming the user with error messages before they’ve even started filling out the form.
To defer validation until “Submit” or “Continue” time, simply call
iv$enable() from within whatever observeEvent
or eventReactive is triggered by the submit/continue
button. You can see this in the 02_deferred example [source,
live demo].
If, on the other hand, your app doesn’t have a notion of “Submit” or
“Continue”, then just go ahead and call iv$enable() as soon
as your InputValidator object is populated with rules.
Guarding calculations and actions
Besides displaying errors to the user, InputValidator
can also help your observers and reactive expressions ensure they are
only operating on complete and valid input (as defined by the rules you
defined on the InputValidator object).
Currently, InputValidator exposes a single, simple
is_valid() method that returns TRUE or
FALSE. You can either use it in a simple conditional:
observeEvent(input$continue, {
  if (iv$is_valid()) {
    # use inputs...
  } else {
    showNotification(
      "Please fix the errors in the form before continuing",
      type = "warning"
    )
  }
})
Or, if you don’t want to do anything besides silently abort the
calculation/action/output, you can use
req(iv$is_valid()):